The Ultimate Wheel Alignment Machine Guide: Drive Straight, Save Tires, and Choose the Right System
If you’re an automotive enthusiast, DIY garage owner, or professional mechanic, adding a wheel-alignment machine to your workspace can be a genuine game-changer. Correct alignment keeps vehicles tracking straight, extends tire life, improves fuel economy, and maintains crisp handling—benefits that pay off whether you service one weekend project or a parking lot full of customer cars.
Whether you’re still in research mode or ready to sign a purchase order, this guide is built to answer the web’s most-searched questions in a single, practical resource. Let’s dive in and see how the right alignment machine can elevate your garage—keeping every vehicle that leaves it driving straight, true, and safe.
Quick Navigation
What Is a Wheel Alignment Machine? (Understanding the Basics)
Why Proper Wheel Alignment Matters (Benefits)
How Does a Wheel Alignment Machine Work?
Types of Wheel Alignment Machines
Key Considerations When Buying
How Much Does a Wheel Alignment Machine Cost?
Calibration & Care
Which Wheel-Alignment Machine Is Best? (Choosing the Right Brand, Type & Model)
Wrapping Up & Next Steps
What Is a Wheel Alignment Machine? (Understanding the Basics)
A wheel-alignment machine—often just called an aligner—is the precision tool technicians use to measure and adjust the angles of your vehicle’s wheels so they match factory specifications. When those angles are dialed in, the car tracks straight, steering feels centered, and tires wear evenly. In other words, the aligner is a high-tech level and protractor system for your suspension.
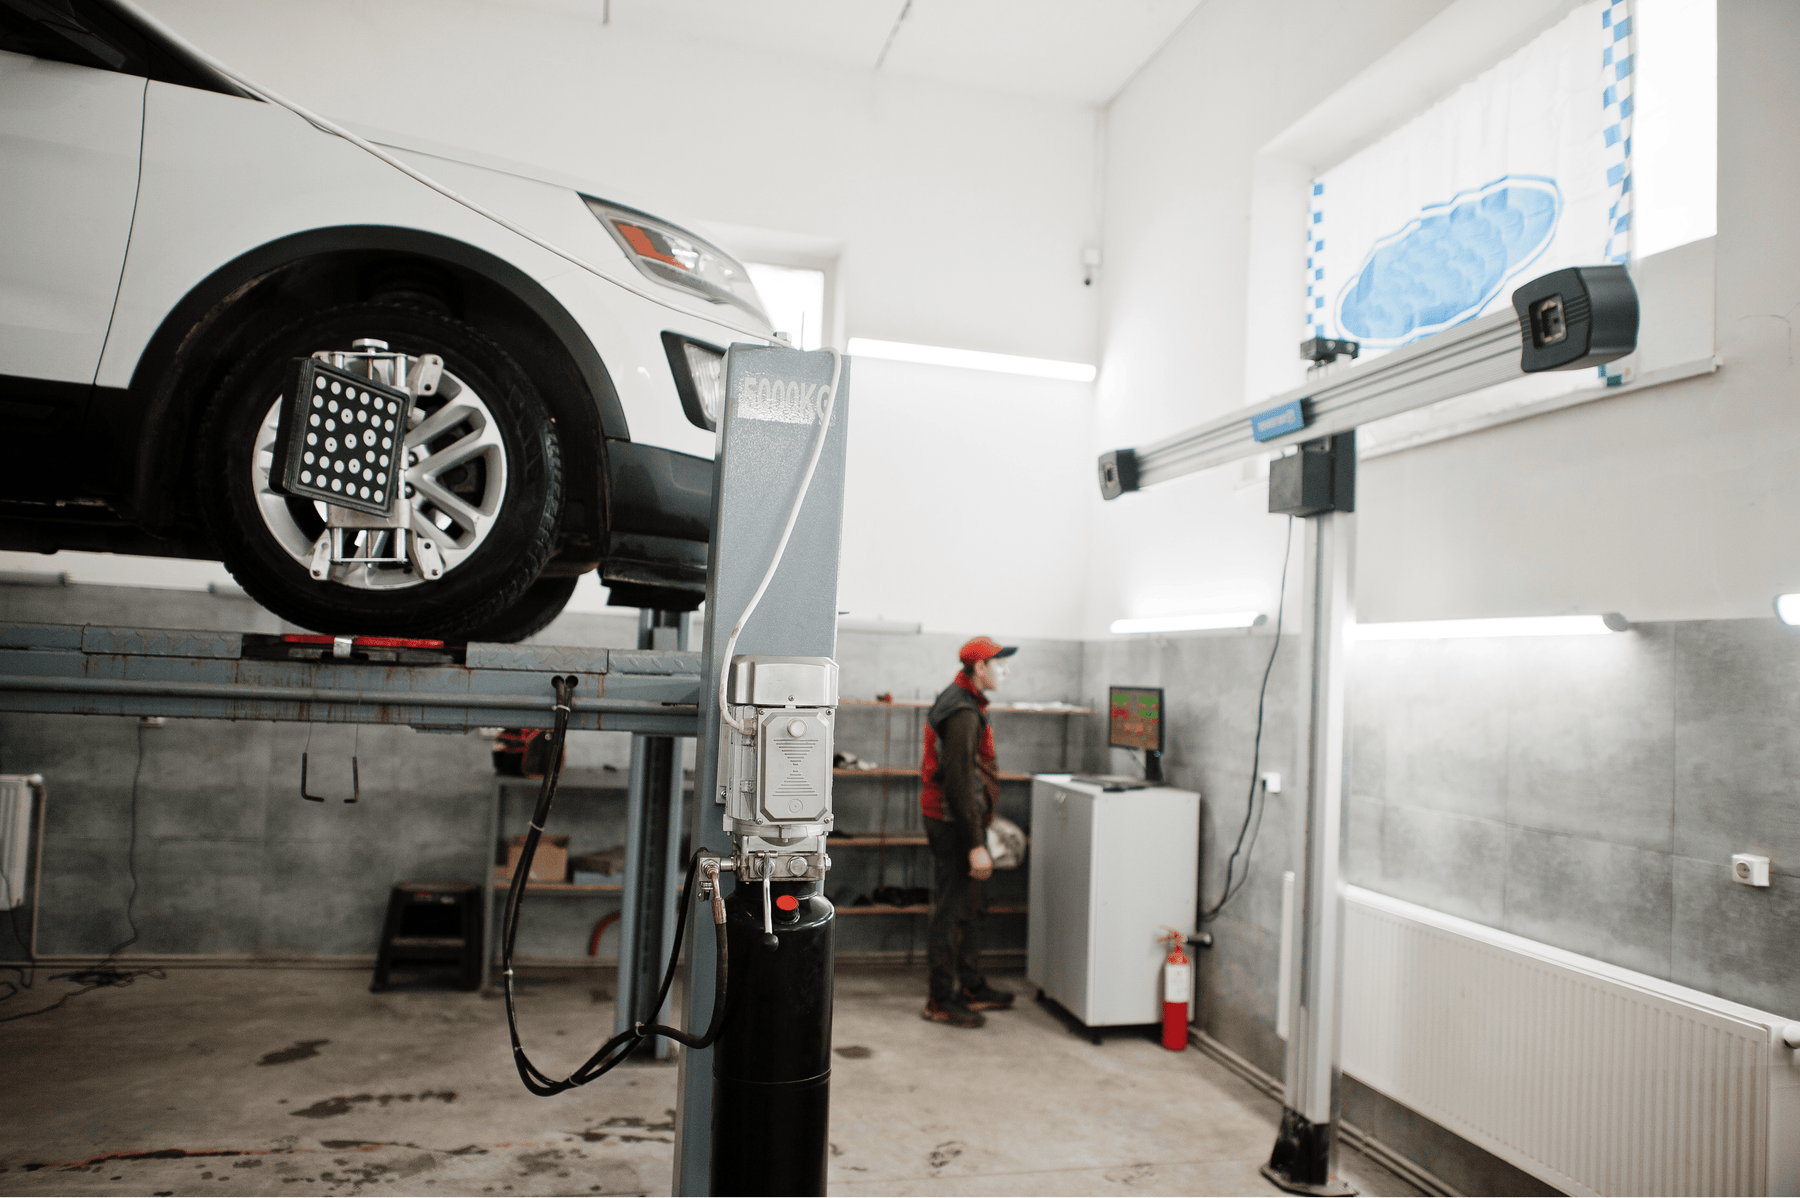
Below are the main pieces you’ll spot in a modern alignment bay, all working together as one integrated system:
- Sensors / Targets on the Wheels – Clamps holding either electronic sensors or lightweight reflective targets attach to each wheel. These give the machine a reference point for angle calculations.
- Camera or Sensor Tower – High-resolution cameras (or older laser heads) face the vehicle and continually track the targets, feeding live position data to the computer.
- Computer Console – A rolling cabinet with a monitor and software packed with OEM specs. It compares live readings to factory numbers and guides the tech through each adjustment step.
- Level Alignment Rack / Lift – A four-post or scissor lift with front turntables and rear slip plates lets the wheels steer and slide freely while camber, caster, and toe are brought into spec.
During an alignment, the technician steers the wheels through a short sweep; the cameras pick up every movement; and the console instantly shows camber, caster, and toe in degrees and minutes. As the tech tweaks tie-rod sleeves or cam bolts, the on-screen angles move from red to green—signaling perfection. In short, an aligner turns what would be guesswork into a repeatable, micron-level process that restores ride comfort, handling safety, and tire longevity.
Why Proper Wheel Alignment Matters (Benefits)
When all four wheels point the right way, the vehicle rolls effortlessly, handles predictably, and treats your wallet more kindly. Below are the core advantages you (or your customers) gain from regular alignments:
- Longer-Lasting Tires – Misaligned wheels drag or scrub, chewing away tread on the inner or outer edges and creating feathering or cupping patterns. A quick alignment keeps the contact patch flat on the pavement, adding thousands of miles to a tire’s life.
- Fuel-Savings at the Pump – Excess toe-in/out or a steering wheel that’s off-center forces the drivetrain to overcome extra rolling resistance. Straightening the wheels removes that drag and helps the vehicle maintain its rated MPG.
- Less Stress on Suspension Components – Correct camber, caster, and toe relieve unnecessary loads on bushings, ball joints, bearings, and tie-rod ends. Fewer stresses mean fewer premature part failures and repair bills.
- Higher Customer Satisfaction & Shop Revenue – For a repair shop, in-house alignment capability solves complaints like pull or vibration on the spot, keeps high-margin work under your roof, and pairs naturally with new-tire sales or suspension jobs.
Bottom line: an alignment machine isn’t just a fancy garage toy—it’s a tool that saves tires, fuel, and suspension parts while boosting safety and shop profitability. Next we’ll peel back the curtain on how these machines deliver such precise angle measurements and adjustment guidance.

How Does a Wheel Alignment Machine Work?
A modern aligner is equal parts precision camera system and real-time suspension coach. Below is a single, streamlined section that blends short narrative blocks with compact bullet steps—no extra line breaks between items.
Initial Setup
- The car rolls onto a level alignment rack or lift with front turnplates and rear slip plates so every wheel can move freely. Parking brake off, wheels chocked if needed.
- Mount lightweight targets / sensor heads to all four wheels, making sure the clamps are perfectly centered.
- Enter the vehicle’s year-make-model so the console pulls the factory camber, caster, and toe specs.
Capture & Calculation
- Cameras (or lasers/CCD heads on older gear) watch the targets while the tech performs a short roll-back/roll-forward or caster sweep.
- The software triangulates each wheel’s position, instantly spitting out camber, caster, toe, thrust-line, and setback.
- A quick runout compensation step removes rim-mounting error for maximum accuracy.
Live Adjustment
- Readings appear in red or green bars on the screen; turning a wrench moves the numbers in real time.
- Toe: adjust tie-rods (front) or rear toe links until both sides sit in spec, steering wheel centered.
- Camber: loosen eccentric bolts, slotted struts, or add shims to bring tilt into the green zone.
- Caster: tweak upper control-arm shims or adjustable arms where the design allows.
Lock & Confirm
- Tighten all hardware, then run a final measurement.
- Console prints a before/after report showing every angle back inside tolerance.
- A quick road test verifies straight tracking and centered steering; if it drives true, the job’s done.
In short, the aligner provides millimeter-level feedback while the technician makes mechanical adjustments—turn the wrench, watch the numbers move, lock it down when everything turns green. Got questions about alignment machines or need help choosing the right one? Contact our team here.

Types of Wheel Alignment Machines
Laser / Optical (Older 2-D Systems)
Early professional aligners relied on laser beams bounced between wheel-mounted heads.
Pros
- Lower purchase price and minimal electronics
- Durable; no software updates to chase
- Some race teams still use compact laser bars for track-side toe checks
Cons
- Time-consuming setup (level each head, zero each scale)
- Limited angles measured directly; caster often requires extra steps
- Floor must be dead-level or the readings drift
Today they’re fine for the occasional alignment on a budget, but most full-service shops have retired them.
CCD / Infrared (Late-90s to 2000s Workhorses)
Charge-Coupled-Device heads talk to each other with infrared LEDs, delivering digital data to the console.
Pros
- True 4-wheel measurement with live camber, toe, thrust, etc.
- Faster than laser setups once the heads are on
- Plenty of used units on the market at attractive prices
Cons
- Each wheel head is an electronic sensor—drop one and calibration drifts
- Infrared needs a clear line of sight (and sometimes cables)
- Periodic fixture calibration is mandatory
If you land a well-maintained CCD system, it can still serve a mid-volume garage, but camera-based rigs are overtaking them fast.
3-D Camera Alignment (Modern Standard)
Twin or quad cameras read lightweight targets on the wheels and build a 3-D model in seconds.
Pros
- Fastest setup: clip the targets, roll the vehicle a half-turn, you’re reading live data
- High accuracy with automatic run-out compensation
- User-friendly graphics, integrated ride-height checks, and ADAS add-ons
- Fewer heavy electronics hanging off expensive rims
Cons
- Higher initial price than CCD or laser systems
- Cameras need occasional recalibration if the bar is bumped
- Fixed bars take one bay; choose a portable stand if space is tight
Most dealerships and high-volume tire stores install 3-D units because the speed pays dividends all day long.
4-Wheel vs. 2-Wheel Alignment
Modern aligners (laser, CCD, or 3-D) all perform 4-wheel alignment—measuring front and rear, computing thrust angle, and centering the steering wheel. Avoid any “front-end only” gadgets unless you’re doing vintage race cars that lack rear adjustment.
Fixed-Bay vs. Portable Systems
| Style | Highlights | Best For |
|---|---|---|
| Fixed camera bar + dedicated alignment rack | Height-tracking cameras, quickest workflow | Busy shops turning multiple alignments a day |
| Portable 3-D stand / lift-mounted cameras | Rolls out of the way when not in use, works with a two-post or scissor lift | Smaller garages or multi-use bays |
Portable 3-D aligners give small shops dealership-level capability without surrendering a bay full-time.
“Automatic” & Emerging Tech
- Auto-caster sweep & live graphics – the machine guides you through each step and locks the wheel at exact angles.
- Self-calibration routines – reduce downtime when a head is bumped.
- Touchless drive-through lasers – scan toe & camber in 30 sec for quick checks; adjustments still need a conventional aligner.
- ADAS alignment integration – some systems walk you straight into radar/camera calibration after the suspension is set.
Bottom line: laser units are yesterday’s bargain, CCD remains a solid mid-budget choice, but 3-D camera systems dominate for speed, precision, and future-proof features—especially if you opt for a portable package that works with your existing lift.

Key Considerations When Buying a Wheel Alignment Machine
Buying an aligner is a serious investment, so ask yourself the questions below before signing a purchase order. Mix quick narrative context with compact bullets so you can scan or dive deep— all in a single, tidy section.
1. Alignment Technology & Accuracy
Start by deciding how modern you want to go. A 3-D camera system gives the quickest setup and the tightest repeatability (often ±0.01°). CCD/infra-red units are a step behind yet still serviceable; laser systems are now mostly legacy.
- 3-D camera = fastest, most user-friendly, highest precision
- CCD/IR = solid mid-tier, often cheaper on the used market
- Laser/optical = budget or legacy only—expect longer setup and fewer live aids
2. Vehicle Coverage & Size Range
Match specs to what rolls into your bay today—and what might show up tomorrow.
- Passenger-car & light-truck sweet spot: up to 148″ wheelbase, 24″ wheels
- Oversized pickups & duallys: verify extra-long wheelbase capacity and clamp extensions
- Motorsports/low-clearance cars: check that cameras can “see” low targets and clamps fit thin rims
- Heavy-duty or bus work? You’ll need a separate HD aligner class altogether
3. Compatibility With Your Lift & Floor Space
Think workflow, not just specs.
- Dedicated four-post rack = fastest drive-on throughput but locks one bay for alignment only
- Portable 3-D system on a two-post or scissor lift = saves square footage for low-volume shops
- Confirm ceiling height if cameras ride on tall towers; some systems need 10 ft + clearance
- Make sure you have room to roll a calibration bar or camera beam in front of the vehicle
4. Software & Database
The console is your co-pilot—make sure it’s helpful.
- Massive, auto-updating vehicle database (ideally via Wi-Fi) prevents spec headaches
- On-screen tutorials and color graphics speed new-tech training
- Custom-spec entry lets performance shops dial in track settings
- Printable or PDF reports brand your shop and prove “before / after” results to customers
5. Ease of Use, Training, and Ergonomics
Faster readings = more profit.
- Quick-grip, rim-friendly clamps cut setup minutes and avoid wheel damage
- Lightweight targets or wireless heads reduce technician fatigue
- Live color bars and steering-wheel centering prompts shrink learning curves
- Ask the vendor about on-site setup and staff training—it’s often worth the extra fee
6. Calibration & Maintenance
Downtime is expensive—choose equipment you can keep in spec easily.
- Self-check or on-board calibration wizards beat waiting for a service truck
- Rugged, drop-tolerant targets and camera housings handle real-world abuse
- Clarify parts availability: can you overnight a replacement camera or clamp?
7. Brand Support & Warranty
A five-figure tool deserves five-star backup.
- Established names (Hunter, John Bean, Hofmann) = broad service networks at premium price
- Value brands (Katool, Atlas) offer compelling savings—verify U.S. parts stock and phone tech help
- Look for at least 24 months parts warranty; extended coverage often pays for itself
8. Budget, ROI, and Bundles
List must-haves (capacity, auto-input, cone/target set) and nice-to-haves (ADAS add-ons, wireless tablets). Then compare bundles—tire-changer + aligner combos often cost less than piecemeal purchases and guarantee matched capacities. Calculate payback: at $100 per alignment, a $12k machine can clear its cost in roughly 120 jobs—easily one busy quarter for many shops. Financing or lease-to-own plans smooth the cash flow and let the equipment earn while you pay.
Choosing an aligner boils down to three questions:
- How modern a platform can you afford?—3-D camera beats CCD, which beats laser.
- What vehicle mix will you really see?—spec-check wheelbase, wheel size, and lift compatibility.
- How quickly must it pay for itself?—balance purchase price against realistic alignment volume, then look for bundle deals that stretch your dollars.
Nail those points and the rest—database size, clamp style, calibration routine, warranty—slots neatly into place. A well-chosen machine adds a high-margin service line, protects your tire investments, and keeps customers coming back because their cars track straight and steer true.
Ready for the next step? Browse our curated Wheel Alignment Machine collection at PitStop Pro to compare specs side-by-side, price out tire-changer + aligner bundles, or chat with our tech team for a personalized recommendation. One smart purchase now can keep every wheel in your bay—yours or your customers’—rolling perfectly for years to come.

How Much Does a Wheel Alignment Machine Cost? 💲
Pricing spans from a few thousand dollars to well north of twenty grand, depending on technology, speed, brand reputation, and the extras bundled into the deal. Here’s what that really looks like—and why each tier might (or might not) make sense for you.
Entry-Level / Portable systems – roughly $3k – $8k
- Basic 3-D or late-generation CCD units from value brands, or lightly used name-brand gear from a decade ago.
- Slower target-to-reading times and fewer convenience features, yet perfectly serviceable for low-volume shops or serious DIY garages.
- Expect manual or semi-auto data entry, smaller vehicle databases, and straightforward steel wheel clamps.
Mid-Range professional aligners – about $8k – $15k
- The sweet spot for most independent shops: modern 3-D cameras, wireless targets, large spec databases, color graphics, printer support.
- Cycle times under two minutes and software that walks the tech through each adjustment.
- Machines in this band often bundle turnplates, slip plates, and rolling camera stands, trimming the need for costly rack upgrades.
Premium / dealership-grade systems – $15k – $30k+
- Top-tier brands, ultra-fast measurement (sub-minute in many cases), ride-height sensing, VIN bar-code scanners, ADAS-calibration tie-ins.
- Rugged construction, nationwide service networks, and white-glove on-site training baked into the quote.
- Bought for throughput and brand cachet—essential in high-volume tire centers and OEM dealers, overkill for casual use.
Hidden or add-on costs to confirm before signing
- Shipping, lift installation, and any floor work (especially if you’re pouring a flush-mount rack pit)
- Initial and recurring calibration tools or fixtures
- Software-update fees or subscription plans for spec-database refreshes
- Replacement targets, clamp jaws, batteries, and extended warranty options
ROI reality check
Even a mid-range $10,000 aligner pays itself off quickly: two alignments a day at $100 each equals roughly $50,000 gross per year. Add the halo effect—fewer outsourced jobs, more tire sales, happier customers who stay in-house—and the math gets sweeter. For enthusiasts, club co-ownership or tool-rental models can justify a lower-cost unit, delivering track-day tweaks and tire-life savings on demand.
Bottom line: most independent garages land in the $5k-$12k window, where modern 3-D technology, solid support, and a full accessory kit converge. Decide your volume, match your lift space, and shop bundled packages—they often fold in training, turnplates, and software updates that would cost more if purchased separately.

Calibration: Keeping Your Alignment Machine Honest ⚙️
Even the most advanced alignment rig drifts out of spec if you never recalibrate it. Sensors age, camera bars get nudged, wheel clamps take the occasional tumble, and all those small “oops” moments chip away at accuracy. A brief calibration session re-zeros the system so the numbers you trust are genuinely true.
When should you do it?
Most manufacturers recommend a full calibration every six to twelve months under normal shop use, or sooner if you relocate the equipment or it receives a hard knock. You should also recalibrate any time readings suddenly seem suspicious—say every car needs a huge toe correction or customers complain of a crooked steering wheel even though your screen shows everything in the green.
What does the process look like?
- Set the stage. Level the rack, wipe camera lenses or reflective targets clean, and make sure the supplied calibration bar (or fixture) is straight and dust-free.
- Mount the clamps. Attach each wheel clamp or target to the calibration fixture exactly as the software shows.
- Follow on-screen prompts. The machine captures reference images or sensor values and stores them as its new zero point, flagging any sensor that’s still out of tolerance.
- Document the results. Save or print the calibration log for your service records—handy proof if you ever need warranty support.
That’s really all there is to it. Plan the job for a quiet morning, take ten unhurried minutes, and you’ll protect every alignment you perform for months. Think of calibration like an oil change for precision tools: inexpensive insurance that keeps customer trust, suspension parts, and tread life all rolling smoothly.
How to Calibrate a Wheel Alignment Machine
When to do it
Most makers suggest an annual calibration, but you should also schedule one any time the machine is moved, a wheel clamp or camera is dropped, or your readings suddenly look “fishy” (for instance, every car needs the same huge toe correction). Many high-end units will even flag you when values creep out of tolerance.
The tools you’ll need
Exactly what you set up depends on the design:
- 3-D camera systems use a calibrated bar or a set of special reference targets that tell the cameras, “this is perfectly straight.”
- Older CCD (infra-red) rigs often hang each sensor head on a fixed jig that holds them at known angles.
- Some newer machines—Katool’s KT-AV9, for example—guide you through an auto-cal routine that needs little more than rolling the cart into position and following on-screen prompts.
If your aligner shipped with a calibration frame or bar, treat it like lab equipment: keep it clean, out of harm’s way, and never bend it.
A typical procedure—without the step-by-step bullet parade
You’ll enter the calibration menu, mount the reference fixtures exactly as the software shows, then let the machine take its snapshots. It compares what it “sees” to the perfect angles stored in memory, calculates any drift, and rewrites its zero points. If a camera can’t find a target—or a sensor is still out of range—the console will stop the routine and tell you what to fix before you try again. When everything passes, the aligner spits out a brief calibration report; print or save that for your records.
Do-it-yourself or call a rep?
Big-name brands such as Hunter and John Bean often bundle calibration visits into a service contract, which is great if you’re slammed with work and want factory support. Value-oriented brands generally let shop staff run the routine themselves; as long as you follow the manual to the letter, results are just as accurate.
Final sanity check
After any calibration, pull in a vehicle you know is straight. If the screen shows numbers that make sense, you’re good to go. If not, redo the routine—or call tech support—before the next customer rolls in.
A short, careful calibration is cheap insurance: it spares you comeback headaches, keeps customer trust, and makes sure every camber, caster, and toe tweak you dial in is the real deal. 📞 Need help or have questions? Reach out anytime through our Contact Us page—we're here to support your shop every step of the way.

Safety & Care Checklist for Your Alignment Bay 🔒🛠️
A modern 3-D aligner is equal parts camera rig, precision gauge, and computer workstation. Treat it that way and it will reward you with spot-on numbers every time.
Daily Habits (takes 60 seconds):
- Wipe the optics. A microfiber swipe across camera lenses and reflective targets keeps dust from skewing readings.
- Stow the clamps & heads. Hang them in the supplied rack—not on a rolling cart where they can tumble off.
- Glance at the turnplates. Make sure the lock pins are in while you load the car and out when you measure; plates should spin with a finger-push.
During Every Alignment:
- Level + Lock the Lift – Set the rack on its mechanical locks so nothing sags mid-adjustment.
- Center & Secure – Steering-wheel holder up front, brake depressor on the pedal. This freezes the chassis so tie-rod tweaks stay true.
- Cable (or Battery) Check – For wired heads, route leads behind posts; for wireless, confirm batteries are green before you start a caster sweep.
- Bounce & Settle – Two solid shoves on each corner settles bushings before you read numbers.
Weekly / Monthly TLC:
- Inspect clamp arms for bent jaws or missing rim pads—replace before they gouge a customer’s wheel.
- Vacuum the console vents to keep the PC cool; back up the database while you’re there.
- Turnplate lube (a dab of grease under the top plate) keeps them floating freely.
- Surge-protect or UPS the console—one lightning pop can fry a main board that costs more than the UPS.
Annual (or After a Hard Knock):
- Run the manufacturer’s full calibration with the supplied fixture.
- Verify rack level front-to-rear with a digital level; shim if needed.
- Book a refresher with all techs—most “machine problems” start with user shortcuts.
Keep it clean, keep it level, and keep the sensors out of harm’s way—you’ll preserve accuracy, avoid comebacks, and give every customer a vehicle that tracks arrow-straight down the road.
Safety Tips for Using a Wheel Alignment Machine 🔒
A good alignment session is 90 % technique and 10 % common-sense safety. Keep the car steady, your fingers clear, and the electronics happy, and you’ll finish every job without drama – or comebacks.
- Secure the vehicle first. Drive onto the rack, drop the lift onto its mechanical locks, and leave the parking brake off so the wheels can float on the turn-plates. If you’re using a two-post plus portable plates, double-check stability and add wheel chocks until you’re ready to measure.
-
Lock what needs locking.
Steering wheel holder keeps the wheel dead-center while you tweak toe.
Brake-pedal depressor (when required) stops the car from creeping.
Both tools prevent surprise movement that can pinch fingers or wreck readings. - Watch the pinch-points. Tie-rods can snap straight when you crack a rusty jam-nut. Keep hands outside the spoke openings and never brace a finger between tire and turn-plate.
- Tip: Turn-plates feel like ice skates; walk around them, not across them, when they’re unlocked.
- Dress and lift like a pro. No loose sleeves, necklaces, or lanyards near spinning wheels. Wheel targets aren’t heavy, but lift with your legs and walk around to the far side instead of leaning over a fender.
- Tidy cabling & consoles. Route any sensor leads behind posts, lock the caster wheels on the computer cart, and keep the work zone free of floor clutter. One trip-and-yank can total a $1 k sensor head.
- Electronics are not shop-tough. Clean lenses with lens cloths, not brake-clean; wipe the touchscreen with electronics-safe spray. Power the console through a surge protector or UPS.
- Two-person rule when adjusting. If one tech turns a tie-rod while another watches the screen, use clear calls: “Turning left-front toe in… stop.” Mis-communication means mis-alignment.
- Post-alignment sanity check. Torque all adjuster nuts, mark them with paint, unlock the wheel holder, remove the pedal depressor, then ease out for a slow test drive. Wheel dead straight? No drift? Job’s done.
Follow these habits, and your aligner stays in one piece, your customers roll out happy, and you finish the day with every knuckle intact. 📄 Want a printable safety checklist? You can also view this Wheel Alignment Machine SOP for a standardized operating procedure you can print or adapt for your shop team.

Which Wheel-Alignment Machine Is Best? (Choosing the Right Brand, Type & Model)
The “best” aligner depends on who’s using it, how many cars you touch each day, how much bay space you can spare, and how much support you need on-call. Below is a single run-through that first matches common shop scenarios to the right category of machine, then spotlights a few proven 3-D systems (all carried by Pitstop Pro) so you can see concrete options in each tier.
Match the Machine to Your Situation
High-volume dealerships & tire chains
Stick with a premium fixed 3-D system—e.g., Hunter Hawkeye Elite or Snap-on/John Bean V3400. These deliver sub-minute checks, integrate with factory ADAS targets, and come with nationwide service reps. You’ll pay $20k-plus, but downtime is practically nil and techs already know the interface.
Independent garages & neighborhood tire shops
Value-driven 3-D units make more sense. Brands like Katool, Atlas (and the entry lines from John Bean) give you modern camera alignment without the luxury-brand markup. Mobile bars that hang on a 2-post lift free up floor space when you aren’t aligning.
Motorsport or specialty chassis shops
Look for aligners that accept wide-angle targets, save multiple custom specs, and work at altered ride heights. Many racers keep a full 3-D unit in the shop for baseline work, then carry laser toe plates or QuickTrick gauges to the track for fast tweaks.
DIY enthusiasts
A full machine is overkill unless you wrench every weekend. Portable kits (QuickTrick, hub lasers) cost a few hundred dollars and handle camber/toe surprisingly well. If you want the real deal, hunt for a compact mobile 3-D system under $7k—just confirm parts support.
Pitstop Pro Short-List: Ready-to-Work 3-D Aligners
| Model | Best For | Why It’s Popular | Typical Investment* |
|---|---|---|---|
| Katool KT-AV6 | Small shops with 2-post or scissor lifts | Mobile camera bar—no dedicated rack; wireless targets; quick setup | $5300.00 |
| Katool KT-AV651 | Tech-savvy garages | Adds smart-device mirroring so a tech can watch live angles under the car; Wi-Fi database updates | $4800.00 |
| Katool KT-AV9 | Busy independents wanting “set-and-forget” | Auto-calibration on power-up, full wireless mobility, built-in PC & printer, lifetime support | $5700.00 |
| Katool KT-AV533 | Fixed Beam System for Precision-Focused Bays | For shops that prioritize repeatability over portability, the KT-AV533 offers a stable dual-camera fixed-beam setup built for high-precision alignments. | $3800.00 |
Every Katool system above is a true four-wheel 3-D aligner, ships with clamps, targets, turn-plate stops, and comes with Pitstop Pro lifetime tech support. They hit the performance sweet spot between low-cost portable gadgets and ultra-premium dealership rigs—perfect for independents who want OEM-level accuracy without a six-figure capital spend.
Quick Decision Grid
- Need blazing speed and franchise-level uptime? Premium fixed rig (Hunter / John Bean)
- Need modern accuracy but must watch cash and floor space? Mobile 3-D (Katool AV-series, Atlas)
- Need niche motorsport adjustments track-side? Portable gauges or a compact laser kit
- Need ADAS calibration bundled in? Consider Autel IA-series combo units
Run your numbers: even a $6k aligner paid off at $100 per job needs only 60 alignments to break even—often inside six months for a modest tire shop. Pick the tier that keeps bays turning and fits the real-estate and budget you live with each day, and you’ll have chosen the “best” alignment machine for you.

Wrapping Up
A wheel-alignment machine isn’t just another big box of electronics—it’s the difference between cars that wander and cars that track arrow-straight, between tires that cup at 20k miles and tires that live a full, even life.
In this guide we’ve walked through:
- What an aligner actually does and why its readings matter down to a tenth of a degree.
- How today’s 3-D systems work (and why laser/2-D rigs are fading away).
- Step-by-step operating basics, calibration, maintenance, and safety.
- Cost tiers and ROI math so you can see where an entry, mid-range, or premium machine pays off.
- Brand-and-type matchmaking—from high-volume dealerships to DIY hobby bays—plus a short-list of 3-D models that give the best bang for the buck right now.
Bottom line: pick a unit that suits your space, workload, and support needs; keep it clean and calibrated; train the team to respect it—and you’ll deliver rock-solid steering and customer smiles for years.
Next Steps
-
Browse the full lineup
Swing by our Wheel Alignment Machines collection on Pitstop Pro for specs, photos, and live pricing on every model we mentioned. -
Build the complete bay
Alignment, balancing, tire-changing—each complements the other. Our Ultimate Wheel Balancer Guide and Tire Changer Guide are ready when you are. -
Need something we missed?
Drop us a line! Call 470-208-2754, use our Contact us page, or email support@pitstop-pro.com. We’re happy to clarify, quote, or compare machines one-on-one. -
Join the conversation
Scroll to the comments below—tell us your alignment success stories, hard-learned lessons, or favorite “aha!” moments. Your real-world tips help the whole community wrench smarter.
Happy aligning—and here’s to miles of straight, safe, and comfortable driving for you and your customers.
Leave a comment