The Ultimate Wheel Balancer Guide: Stop Vibration, Extend Tire Life, and Choose the Right Machine
Ever hit 60 mph and felt the steering wheel start to dance? Or spotted those weird bald spots on your tires? Nine times out of ten, that’s wheel imbalance. In this guide, you’ll learn exactly how balancing works, which machines fit your budget, and the simple steps to banish vibration for good—whether you wrench at home or run a full-service shop. By the end, you’ll be ready to dial in perfect balance and enjoy glass-smooth highway miles. Let’s dive in!
Quick Navigation
What Is a Wheel Balancer? (Understanding the Basics)
Why Wheel Balancing Matters
Static vs. Dynamic Balancing
Types of Wheel Balancers & Common Features
Parts of a Wheel Balancer
Why You Need a Wheel Balancer
Benefits of Proper Wheel Balancing
How to Choose the Best Wheel Balancer
How to Use a Wheel Balancer Machine
How Much Does a Wheel Balancer Cost?
Frequently Asked Questions (FAQ)
Conclusion & Next Steps
What Is a Wheel Balancer?
A wheel balancer is a machine that spins the tire-and-wheel assembly, detects heavy or light spots, and tells you exactly where to add small weights so the wheel rotates smoothly. The payoff is simple: no steering-wheel shimmy, less tire wear, and a ride that feels like glass.
Definition & Purpose
A modern balancer:
- Detects imbalance by measuring vibration as the wheel spins.
- Pinpoints weight placement, showing where and how many grams/ounces to clip or stick on.
- Verifies smooth rotation once the weights are added, ensuring the wheel spins true around the axle.
Even weight distribution means the wheel no longer wobbles, preserving ride comfort and protecting suspension components from extra stress.
Why Wheel Balancing Matters ⚖️
Left unchecked, imbalance does more than annoy you with a shaky steering wheel:
- Ride Discomfort: Persistent vibration makes long drives tiring and erodes driver confidence.
- Premature Tire Wear: Uneven loading creates bald spots or cupping, sending perfectly good rubber to the scrap pile early.
- Suspension & Bearing Strain: Extra shake beats up bushings, shocks, and wheel bearings—repairs you don’t want to pay for.
- Fuel Efficiency Hit: The engine works a bit harder to push wobbling wheels; every little bit of rolling resistance counts.
- Safety Concerns: Severe imbalance can affect braking and high-speed stability—balanced wheels keep the car planted in emergency maneuvers.
Bottom line: every new tire install, rotation, or vibration complaint should trigger a balance check. It’s cheap insurance for a smoother, safer, and more economical ride.
Static vs. Dynamic Balancing ⚖️
When a balancer spins a wheel it’s really looking for two kinds of imperfections.
Static Balance
Static balance is the simple “seesaw” problem—one point on the circumference is heavier than the rest, so the wheel hops up and down. Correcting it is as easy as placing a weight exactly opposite that heavy spot. A single-plane (static) fix will stop the vertical bounce but it tells you nothing about side-to-side wobble.
Dynamic Balance
Dynamic balance addresses that wobble. Here the machine measures imbalance in two planes—the inner and outer faces of the rim—because weight can be off on one side, the other, or both. True dynamic balance almost always calls for two weights: one on the inside flange and one on the outside. Modern computer balancers default to this two-plane correction, so when you hear a tech say a wheel is “balanced,” they nearly always mean dynamically.
Most of the time you’ll choose the dynamic program and be done, but single-plane (static) balancing still has its place—think narrow motorcycle rims, wheels that can only accept one adhesive weight, or specialty race setups where grams matter.

Types of Wheel Balancers & Common Features 🛠️
Manual static balancers (bubble balancers)
A bubble level on top shows the heavy spot as the wheel slowly settles under gravity. They’re portable, need no electricity, and cost little, which makes them popular for motorcycles, ATVs, or an occasional DIY car project. The trade-off is precision: they correct static imbalance only, so high-speed highway smoothness isn’t guaranteed.
Motorized dynamic balancers (computer balancers)
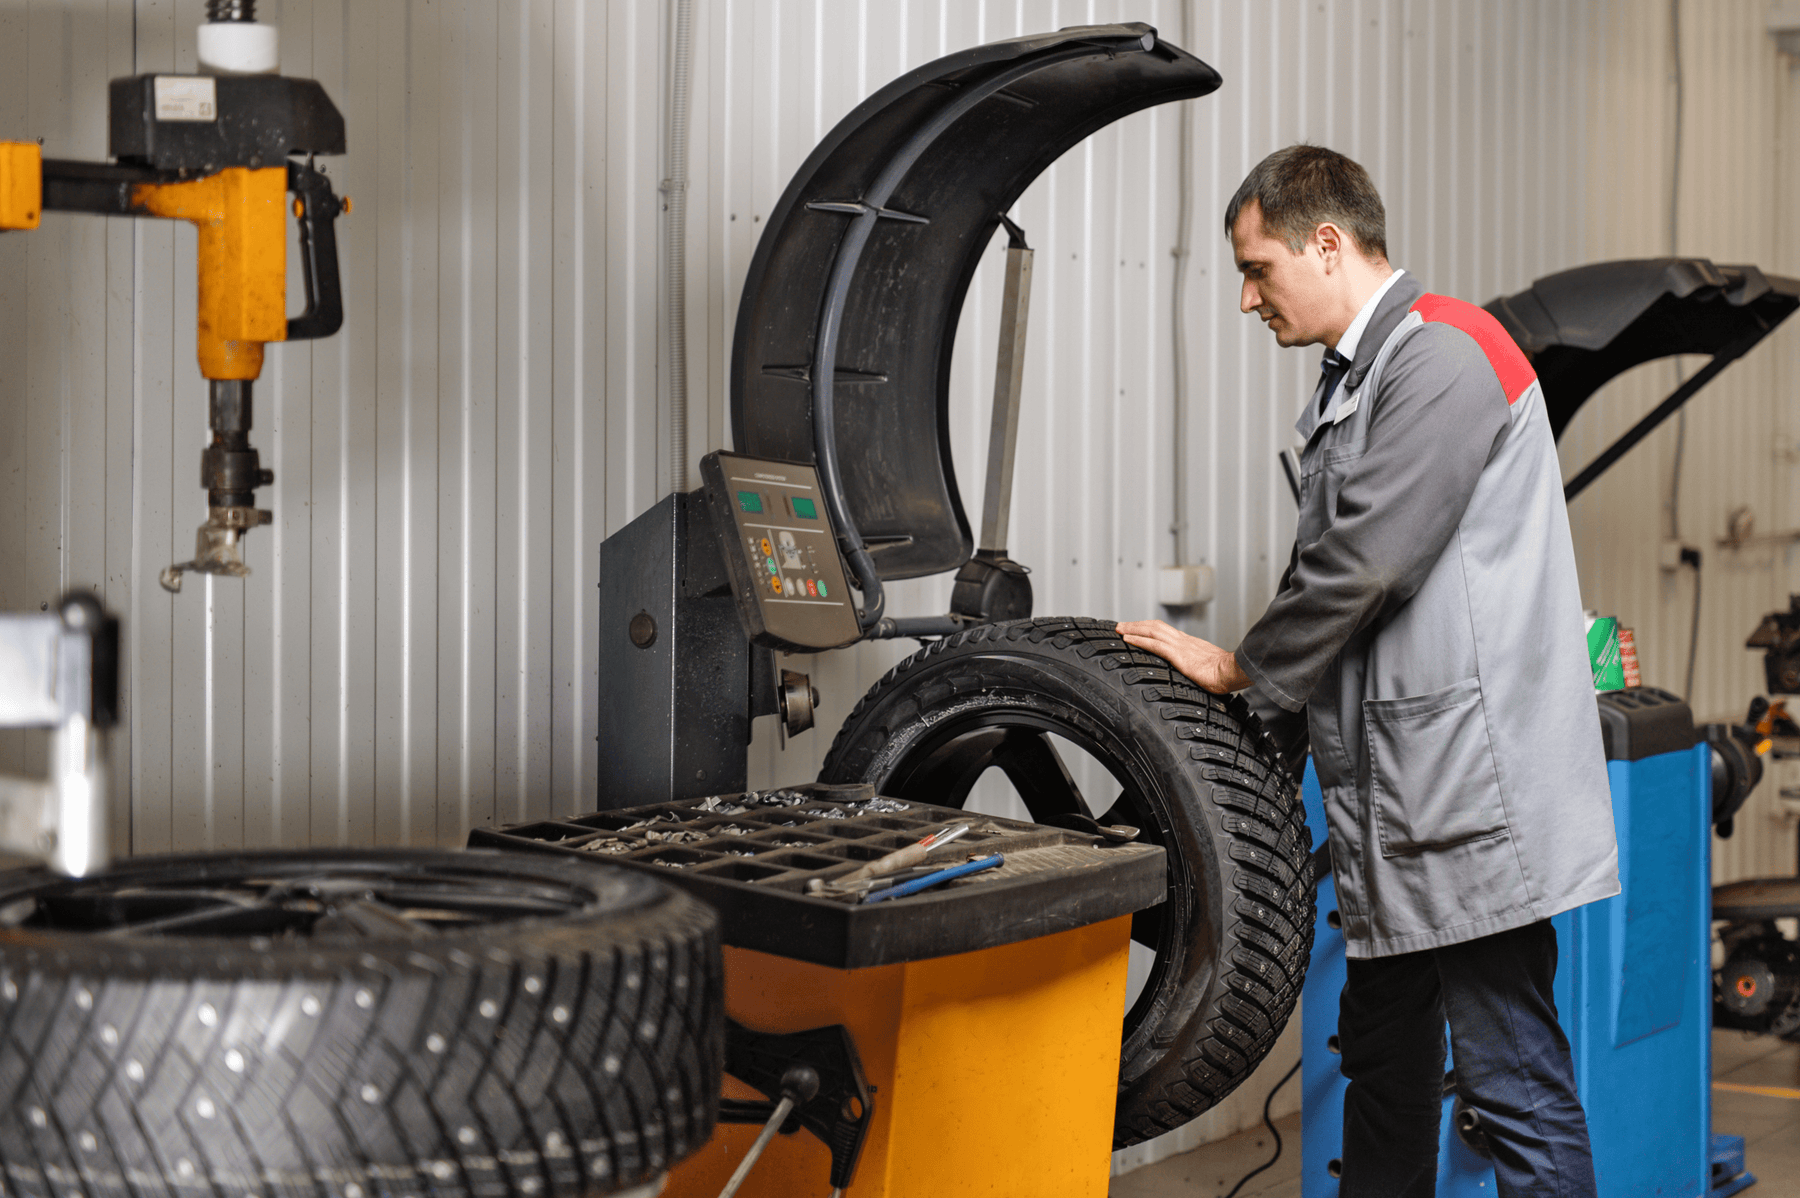
The shop standard. You mount the wheel on a spindle, close the protective hood, and the machine spins it to about 100–300 RPM. Internal sensors read vibration in two planes, then a digital display tells you exactly how many grams or ounces to stick at the 12-o’clock position on each rim flange. Better models auto-measure rim width and diameter with an articulating arm, light up the weight spot with a laser, and hold the wheel in place while you press on the weight.
Road-force balancers
These premium units add a big rubber roller that presses against the tread during the spin. By simulating the tire’s contact patch they pick up tire uniformity issues—stiff spots, run-out, and radial force variation—that a regular balancer misses. High-end shops use road-force testing to chase down stubborn shakes even after a normal balance shows “zero.”
Motorcycle-specific balancers
Bike wheels are lighter and use a single-sided swingarm or narrow hub. Dedicated motorcycle balancers (or car balancers fitted with bike adapters) center the wheel correctly and spin it at lower speed, protecting delicate rims.
Key Features on Modern Wheel Balancers
- Mounting shaft & centering cones – A beefy spindle, matched with interchangeable cones or adapters, guarantees the wheel is held perfectly on-center. A quick-release wing nut (or locking collar) clamps everything tight in seconds.
- Digital interface – From simple LED bars to full touchscreens, the display tells you two things: how much weight to add and exactly where to place it, often flashing a 12-o’clock indicator when the wheel is in position.
- Auto-measuring arms – Pull the arm to the rim and the balancer records diameter and offset automatically; many units also sense width. Fewer manual entries mean faster, more accurate setups.
- Multiple balance modes – Dynamic and Static are the basics; ALU programs let you hide adhesive weights on custom alloys without sacrificing precision.
- Easy calibration & self-diagnosis – A quick routine with a known weight keeps the sensors honest, while built-in error codes flag any signal issues before they ruin a balance job.
- Fast cycle time – Shop-grade machines typically spin, measure, and brake in 5–10 seconds, keeping high-volume bays moving.
- Position hold or laser pointer – Once the imbalance is measured, an internal brake (or laser light) locks the wheel at the exact spot so both hands are free to stick on the weight.
- Integrated weight tray – Compartments for clip-ons, stick-ons, valve cores, pliers, and calipers keep everything within reach and the work area tidy.
- Safety hood interlock – A polycarbonate cover contains any flying weight; the machine won’t spin unless the hood is down, protecting both operator and bystanders.
Knowing which of these features you can’t live without—and which are nice extras—will guide you toward the balancer that truly fits your workload and budget. Up next: a closer look at the balancer’s core components and why a few grams of lead (or steel) make such a night-and-day difference on the road.

Key Parts of a Wheel Balancer
1. Mounting Shaft & Centering Cones
A precision-machined spindle holds the wheel. Slip the correct cone (or specialty adapter) into the hub bore, tighten the wing nut, and the rim sits perfectly centered—crucial for an accurate reading.
2. Drive Motor & Vibration Sensors
An electric motor spins the assembly while piezoelectric sensors (accelerometers) “feel” any shake. Their data feeds the balancer’s computer, which calculates how many grams/ounces—and where—to place weights.
3. Control Panel & Display
Your command center:
- Digital readouts show inner/outer weight amounts.
- LEDs or lasers mark the exact 12-o’clock weight position.
- Soft-keys or a touchscreen let you enter rim dimensions, pick Dynamic, Static, or ALU modes, start/stop spins, and run calibration.
4. Safety Hood (Wheel Guard)
The polycarbonate cover encloses the wheel during the spin. Most machines won’t run unless the hood is down, protecting you from a flying weight. Many hoods also have a built-in tape measure or holder for width calipers.
5. Weight Tray & Tool Storage
Compartments for clip-ons, stick-ons, calibration weights, pliers, scrapers, and calipers keep everything organized and within easy reach—vital when you’re balancing wheel after wheel.
These assemblies work together every cycle: mount and center the wheel, spin it up, let the sensors detect imbalance, read the display, add weights, verify, and you’re done. Up next, we’ll see who benefits most from owning—or at least having access to—a quality wheel balancer.
Why You Need a Wheel Balancer
A balancer isn’t just shop eye-candy—it saves money, preserves tires, and keeps vibrations out of the steering wheel. Here’s how it helps four common user groups in plain language (with a splash of bullets for quick scanning).
🔧 Dedicated DIYers & Car Enthusiasts
Swapping winter / summer sets? Rotating tires on two or three family cars? A compact electronic balancer pays for itself fast.
- Skip the shop visits: Mount and balance on your schedule—no appointments, no per-tire fees.
- Track-day convenience: Racers who change wheels between sessions can correct imbalance in minutes.
- Long-term payoff: Even a ~$1 k home-grade balancer becomes cheaper than dozens of $15 wheel balances over a few seasons.
🛠️ Professional Mechanics & Auto Shops
For a tire bay, a fast, accurate balancer is as essential as a lift.
- Zero comebacks: Precise readings mean customers don’t return complaining, “It still shakes at 70 mph.”
- Throughput: 5-second spin cycles keep a busy shop moving.
- Versatility: Handle 12″ commuter wheels to 24″ performance rims and light-truck tires on one machine.
🚚 Fleet Managers & Commercial Operations
Downtime is lost revenue; in-house balancing keeps vehicles rolling.
- Re-balance wheels after every rotation or new tire install—no booking outside service trucks.
- Tire life maximized: Even wear saves thousands across a fleet.
- Driver comfort & safety: Less vibration means less fatigue and fewer suspension repairs.
🏍️ Motorcycle Shops & Racers
A slight imbalance feels huge on a two-wheeler.
- Handlebar buzz gone: Static stands or bike-specific electronic balancers dial out high-speed shake.
- Track confidence: Smooth wheels = predictable handling in corners and under braking.
- Special adapters: Single-sided swingarm or narrow-hub wheels mount securely without damage.
Bottom line: If you change or service tires with any regularity—whether it’s five sets a week in a shop or two sets a year in your garage—a wheel balancer quickly becomes the most appreciated tool you own.

Still on the Fence? — A Quick Cost-Savings Reality Check 💸
Picture your yearly tire routine.
Maybe you have two family cars, a winter beater, and a weekend bike. Each wheel set gets balanced, say, twice a year—once when the snow tires go on, once when they come off.
| Vehicles | Balances / yr | Wheels / balance | Shop fee | Annual spend |
|---|---|---|---|---|
| 2 cars | 2× | 4 wheels | $15 / wheel | $240 |
| 1 bike | 2× | 2 wheels | $15 / wheel | $60 |
| Total | ≈ $300/yr |
Five years of that routine is about $1,500—right in the ballpark of an entry-level electronic balancer for your garage.
For DIYers 🛠️
- Immediate access: Rotate or swap sets at midnight before a road trip—no booking, no waiting-room coffee.
- Peace of mind: You calibrated the machine; you know the balance is spot-on.
- Community perks: Balance friends’ or club members’ wheels for goodwill (or pizza money).
For Shops & Pros 💼
- Revenue keeper: Balancing in-house turns every tire sale into a full-margin service.
- Workflow speed: A 7-second spin cycle keeps bays open and comebacks almost nil.
- Upsell power: “Yes, we can mount and balance those 22-inch forged wheels today.”
For Fleets & Commercial Ops 🚚
- Fewer outside service calls means less downtime.
- Even wear extends tire life across dozens—or hundreds—of vehicles.
- Drivers appreciate the smooth ride; your maintenance budget appreciates the savings.
Bottom line: Whether you’re saving $300 a year in your own driveway or generating thousands in shop revenue, a balancer pays itself off quickly—and every mile afterward feels smoother for it. Have questions before you buy? Contact us today.
Why Proper Wheel Balancing Matters ⚖️
Balanced wheels pay you back every mile you drive. Here’s how:
Smooth, Vibration-Free Ride 🏆
The first thing you notice after a good balance is what you don’t notice—no more steering-wheel buzz at 65 mph or seats that shimmy on the highway. A smoother ride reduces driver fatigue and makes even an older car feel “factory fresh.”
Longer-Lasting Tires 🔧
Unbalanced wheels hammer one patch of tread harder than the rest, creating cupping or bald spots. Even, 360-degree wear can add thousands of extra miles to a tire’s life—often enough to cover the cost of a balancer all by itself.
Happier Suspension & Bearings
Every shake from an unbalanced wheel is a tiny hammer blow to shocks, struts, bushings, and wheel bearings. Keep things in balance and those components last longer, saving you the cost (and downtime) of premature repairs.
A Tweak to Fuel Economy 📈
The energy that makes a wheel hop instead of roll is wasted fuel. The MPG gain is small—think fractions of a percent—but across a fleet or a long commute, balanced wheels help squeeze every drop of efficiency.
Safety & Handling Confidence 🛡️
At speed, imbalance forces multiply. Balanced wheels maintain full road contact, giving you consistent grip during hard braking or evasive moves. They also keep ABS, traction control, and other sensors free from vibration-induced noise.
Customer Satisfaction for Shops 👍
In a tire bay, perfect balance is the unsung hero: customers don’t complain when the wheel is smooth, but they always notice a shake. Fewer comebacks, better reviews, and the chance to upsell vibration fixes make a quality balancer one of the most profitable tools on the floor.
A few quarter-ounce weights placed precisely can save thousands in tire wear, suspension repairs, and lost shop time. And if you’re upgrading your setup, don’t overlook the value of pairing it with a high-quality tire changer for maximum efficiency. Next up: how to choose—and use—the right balancer so you enjoy these benefits on every wheel.

READY TO BUY?
Browse wheel alignment machines at Pitstop Pro. Top brands, full system options, with Lift Specialists ready to help you spec the right setup.
Shop alignment machinesHow to Choose the Best Wheel Balancer 🛠️
Ready to pick out a wheel balancer for your garage or shop? Here we break down the key factors to consider in your buying decision, following the buyer’s journey from identifying needs to making a final choice. By the end, you’ll know exactly what to look for (and what the best wheel balancing machine for you might be).
1. Decide on the Balancer Type
Start by matching the machine style to your budget and the kind of service you perform. Bubble balancers are fine for occasional, low-speed wheels, but most DIYers and small shops gravitate toward motorized electronic units. High-volume or luxury tire shops may step up to a road-force balancer to solve the stubborn vibration cases.
Key points at a glance:
- Bubble / Static – $50 – $150, no power required, static (one-plane) correction only—adequate for ATVs, tractors, or slow-speed trailers.
- Standard Electronic – $800 – $3 k, 110 V or 220 V, dynamic accuracy for passenger cars and light trucks; the “sweet spot” for most garages.
- Road-Force / Diagnostic – $8 k – $15 k+, roller adds simulated road load; premium service for luxury dealers and high-volume tire stores—overkill for casual use.
2. Confirm Wheel Size & Vehicle Coverage
Make sure the machine’s specs align with the wheels you balance now and the ones you might see later. Overshooting capacity wastes money; undershooting causes headaches.
Size & vehicle checklist:
- Cars & SUVs – Target 10″–26″ rim range, 70–100 lb max wheel weight.
- Motorcycles – Need a bike-specific balancer or an adapter kit for smaller hubs.
- Heavy-Duty Trucks – 30″+ rim, 200 lb capacity, 220 V power (e.g., Triumph NTB-1200 class).
- Custom 28″+ Rims / Wide Tires – Verify cone set reaches large hub bores and widths; a laser pointer helps hide stick-on weights behind spokes.
3. Double-Check Shop Logistics
Even the best balancer is useless if it won’t fit or run in your workspace. Measure the bay so the hood can swing open, confirm you have the right outlet voltage, and be sure the machine ships with a calibration weight and a full cone set. A quick call to the vendor about parts availability tells you how painless future maintenance will be.
- Correct power supply (110 V vs 220 V) and air line (road-force units).
- Floor space for the balancer and its fully opened hood.
- Included cones/adapters for small car hubs and larger SUV wheels.
- Reference weight in the box for calibration.
- Warranty length and a responsive parts hotline.
Wrap-up: Balance your budget against the wheel mix you service most often. A solid mid-range electronic balancer covers 99 % of passenger-vehicle work, bubble units suit occasional farm tires, and road-force machines excel in premium, high-volume environments. Still unsure which balancer is right for you? Give our team a call at (470) 208-2754 we’re happy to walk you through the best options for your garage or shop.
Usage Level: Home Garage vs. Commercial Shop ⚙️
How often you balance wheels should drive your build-quality and feature checklist. Light weekend work can get by with a simpler unit; nonstop shop use calls for a tank-tough machine.
Home / Hobby Use
- Balance sets only a few times a month → lighter-duty motor and components are fine.
- Spin time of 12-15 seconds isn’t a problem when speed isn’t money.
- Noise matters in a small garage—budget models can be louder.
- ~$1 k range (e.g., Katool KT-B700) still delivers ±1 g accuracy without wrecking the wallet.
Professional Shop (High Volume)
- All-day duty cycle demands robust motors (often direct-drive) and belt-free reliability.
- Well-known brands—Hunter, Coats, CEMB—offer faster acceleration and stronger support networks.
- Features that shave seconds: auto data entry arms, pedal wheel brake, hidden-weight laser, optimization prompts.
- Expect $2 k–$5 k upfront, but five minutes saved per car × 20 cars/day = ~100 extra billable minutes daily.
- Simple, intuitive UI keeps multi-tech teams from making costly input errors.
Bottom line: Casual DIYers can prioritize affordability and simplicity, while busy bays should treat a heavy-duty, service-backed balancer as revenue equipment—not a cost. When undecided, lean to the sturdier side; no one complains a machine is too reliable.

Key Features and Accessories to Consider ✨
A well-chosen balancer should streamline your workflow, cut down on errors, and handle every wheel that rolls into your bay. The list below pairs short explanations with tight bullet points for quick reference.
Automatic Data Entry – Auto-sensing arms (or sonar) grab rim distance, diameter, and sometimes width, cutting setup time and fat-finger errors to nearly zero.
- Faster workflow, fewer keypad mistakes
- Standard on many mid-range machines
Laser Guide / LED Indicator – A built-in laser line or LED pinpoints the exact spot for a stick-on weight so you don’t eyeball it.
- Prevents 2-inch placement errors
- Essential for hidden weights on fancy alloys
Cone & Adapter Kit – Accuracy starts at the hub; verify the balancer ships with at least three cones plus optional flange plates or motorcycle shafts if you need them.
- Covers small car hubs to light-truck bores
- Add collets or BMW/Merc kits for euro wheels
Quick-Release Wing Nut – Nearly universal on new units, but double-check when buying used.
- One-handed clamp on/off
- Speeds every mount cycle
Wheel-Hold Brake – Some models lock the wheel automatically when the hood rises; others use a foot pedal for hands-free weight placement.
- Holds spindle at 12 o’clock
- Frees both hands to press adhesive weights firmly
Self-Calibration & Diagnostics – A one-weight routine keeps sensors honest; smarter units flag bad pickups before you chase phantom vibrations.
- Quick 100 g calibration puck
- On-screen alerts for sensor drift
Spin Speed & Accuracy – Look for ±1 g (0.25 oz) resolution and sub-10 s spin cycles; premium units hit 6 s or less.
- Under-10 s is fine for most shops
- Faster cycles add billable minutes in high-volume bays
Mobility & Footprint – Check total height with hood raised and whether casters are included or optional.
- Needs clear ceiling space for hood swing
- Casters help in multi-purpose bays
Brand Support & Warranty – Parts availability matters more than an exotic feature list.
- Established networks (Coats, Hunter, CEMB) ship boards and sensors fast
- Value brands (Katool, Triumph) still offer phone tech lines and 12-36 mo. warranties
Extra Bells & Whistles – USB updates, printouts for customers, network connectivity—nice, not mandatory unless you market premium service.
- Printouts impress upscale clients
- Network link can log jobs automatically
Pro tip: List must-haves (capacity, auto-input, cone set) and nice-to-haves (laser pointer, turbo spin). Then compare bundles—tire-changer + balancer combos often cost less than piecemeal purchases and guarantee matched capacities. A properly spec’d balancer pays for itself in smoother rides, longer tire life, and happier customers. Need inspiration? Check out our full wheel-balancer collection (and combo deals) at PitStop Pro to see models that tick every box.

How to Use a Wheel Balancer Machine 🔧
Balancing isn’t mysterious once you know the flow: prep the wheel, spin for measurements, add weights, and verify. Below is an easy-to-follow sequence that mixes short narrative guidance with concise bullet reminders.
1. Prepare the Wheel and Balancer
Begin by powering up the machine and giving it a moment to run any self-diagnostics. While it does, inspect the wheel: pry off every old weight—clip-ons on the bead and stick-ons inside the barrel—because leftover weight will skew the reading. Check that the tire is properly seated and inflated to driving pressure; low pressure lets the bead squirm during the spin.
- Cone selection: choose the centering cone that fits snugly in the hub bore.
- Mounting: slide the wheel onto the spindle (usually cone from the back), spin the quick-release nut tight, and ensure the wheel sits flush.
- Data entry: swing out the measurement arm so the balancer auto-records distance and diameter, or key them in manually along with rim width. Accurate numbers here guarantee an accurate balance later.
2. Spin and Measure
Close the safety hood. Most balancers start automatically or with a single button press. The motor accelerates the wheel to a set speed and the sensors capture vibration in two planes. When the wheel coasts down, the display pops up with weight amounts and tells you exactly where they belong—often showing something like Inner 1.25 oz and Outer 1.00 oz. Leave the wheel clamped; you’ll add weights before moving it.
3. Add Wheel Weights ⚖️
Rotate the wheel until the machine’s LED, beep, or laser shows the first placement point—typically 12 o’clock—then use the foot-pedal brake (or auto-lock) to hold position.
- Select weight: pick the closest size in clip-on or adhesive form.
- Clean rim: a shot of brake cleaner ensures stick-ons stay put.
-
Attach: press adhesive firmly for a second, or seat clip weights fully on the flange.
Repeat for the second plane. A precise placement only an inch off can throw the result, so follow the pointer exactly.
4. Re-Spin and Verify ✅
Lower the hood again and run a short verification spin. Ideal read-out is 0.00 oz/0 g on both planes—or within the machine’s tolerance (often ±0.25 oz or 5–7 g).
If the balancer still calls for more weight:
- Check that nothing shifted on the spindle.
- Confirm your first weights stayed attached (look inside the hood—sometimes fresh tape flings off).
- Re-enter rim data if you suspect a typo.
Persistent large corrections can point to a bent rim or defective tire; match-mounting or road-force testing may be required.
5. Remove and Inspect
Release the wing nut, slide the wheel off carefully, and give each weight a firm tug to ensure it’s seated. Some techs mark the rim with a dab of paint or a date sticker for record-keeping. Finally, wipe the cones and spindle, stash the calibration weight where you can find it next time, and drape a cover over the balancer to keep dust off the sensors.
Balanced wheels mean smoother rides, less tire wear, and happier drivers—exactly what a good balancer delivers once you follow this routine. Still have questions? Contact us here.

How Much Does a Wheel Balancer Cost? 💲
Prices span from “bare-bones DIY” to “dealership diagnostic lab.” Below is a tier-by-tier snapshot that blends narrative context with tight bullet takeaways—no blank lines separating bullets.
1. Bubble Balancers (Manual Static) — ≈ $50-$200
A bubble balancer is little more than a pivot stand with a level vial. Perfect for farm equipment, motorcycle wheels, or a classic-car hobbyist who cares more about nostalgia than 80-mph perfection.
- Cheapest path to static balance—no power, no electronics
- Corrects up-and-down “hop” only; doesn’t fix side-to-side shimmy
- Portable and nearly indestructible, but accuracy drops as speed rises
2. Entry-Level Motorized Balancers — ≈ $1,000-$1,500
Think 110 V plug-in units from value brands such as Katool. Ideal for home garages or start-up shops that see a handful of wheel sets each month.
- Digital display, dynamic + static modes, ~10 s spin cycle
- Basic cone set, usually manual data input; auto-diameter on nicer models
- Professional precision (±1 g) without pro-level price—support quality varies, so buy from a reputable dealer
3. Mid-Range Commercial Balancers — ≈ $1,500-$3,000
Now you’re in true shop territory: sturdier shafts, faster motors, and extras that shave minutes off every job. Check out our triumph collection for reliable models.
- Partial or full auto data entry, laser or LED weight pointers
- Broader cone/adapter assortment and heavier wheel capacity (70-100 lb)
- Perfect for busy independents, tire boutiques, or the serious DIY racer who wants fast, fool-proof results
4. High-End Professional Balancers — ≈ $3,000-$7,000
Hunter, Coats, Hofmann, CEMB—their flagship models live here. Built like bank vaults and calibrated to the last gram.
- Sub-5-second cycles, touchscreen UI, automatic weight split & brake hold
- Optional wheel lifts, dual lasers, self-diagnostics, brand field service
- Purchased by tire chains, luxury/performance shops, or any operator who can’t afford downtime
5. Road-Force & Specialty Balancers — ≈ $8,000-$15,000+
Adds a roller that presses against the tread, revealing defects a normal spin can’t detect.
- Diagnoses high-spot tires, bent rims, and mounting mismatch issues
- Generates printouts to prove vibration root-cause to picky customers
- Overkill for most; priceless for OEM dealerships or shops chasing zero-complaint ride quality
Budget reminders: freight, optional adapters (motorcycle shaft, flange plate), and possible installation labor add to sticker price. Checking out PitStop Pro’s balancer collection—or bundle deals that pair a tire changer with a matched balancer—often trims hundreds off piecemeal costs while guaranteeing compatible capacities.
Rule of thumb:
- Hobbyist / light use → spend ~$1 k-$2 k once, enjoy pro-grade balance for years.
- Commercial shop → invest $2 k-$4 k; the machine pays itself off after a few hundred wheels in labor saved and customer retention.
- High-volume or diagnostic specialty → step up to $5 k-plus for speed, brand support, and road-force wizardry.
Armed with these ranges, you can shop confidently—and remember, the smooth ride, longer tire life, and happier clients will make a properly spec’d balancer worth every penny. Still need help? Email us at support@pitstop-pro.com.

Frequently Asked Questions (FAQ)
Below are more Q&A points, designed to help you quickly find answers to common questions.
Q: Are scissor lifts safe to use for working under a car?
A: Yes. Mechanical locks engage automatically, supporting the vehicle on solid steel bars. Stay within weight limits, use proper lift points, and always lower onto the locks before working—follow the manual and a scissor lift → is extremely safe.
Q: Do I need to bolt a scissor lift to my garage floor?
A: Usually not. Low- and mid-rise surface-mount lifts rely on their own weight for stability. Only certain flush-mount or heavy alignment models may specify anchoring—check your manual to be sure.
Q: What kind of maintenance does a scissor lift require?
A: Grease pivot pins, inspect locks and hoses, top up hydraulic oil, and tighten bolts yearly. Quick visual checks before each use keep these low-maintenance lifts running smoothly for years.
Q: How do I move or store a scissor lift when I’m not using it?
A: Lower the lift, attach its dolly handle, and one person can roll the ~1,000-lb unit on built-in casters. Store flat, stand upright, or slide it under a workbench to free floor space.
Q: How much ceiling height do I need for a scissor lift?
A: This depends on the lift type and how high it raises the car. For a mid-rise scissor lift (lifting ~3–4 ft), a standard garage ceiling (≈8 ft) is usually fine. If you have a低 ceiling, stick with mid- or low-rise; full-rise scissors often need 10–12 ft clearance.
Q: Scissor lift vs. two-post lift → – which one should I get?
A: It depends on your needs and constraints. Both have their pros and cons:
• Space & Mobility: Scissor lifts occupy less room and can be stored; 2-posts require anchoring and height.
• Undercar Access: 2-posts give a totally open underside; scissors support the middle but still free the wheels.
• Ease: Scissor lifts are quicker to position and rarely need concrete work.
• Versatility & Cost: Scissors are cheaper and simpler; 2-posts excel at heavy drivetrain work.
Q: What concrete thickness do I need under a car scissor lift?
A: Most surface-mount lifts are fine on a 4-inch, 2,500 psi slab; heavier full-rise models may require 5 inches. Always double-check the manual before installation.
Q: Does a car scissor lift run on 110 V or 220 V power?
A: Low-rise and many mid-rise units plug into 110 V; faster full-rise lifts usually need 220 V on a 30 A circuit. Verify the pump label first.
Q: Do I need compressed air as well as electricity?
A: Most models are purely electro-hydraulic; a few use a 90–120 psi air line only to release safety locks. Your manual will say if air is required.
Q: Can one person move a portable scissor lift?
A: Yes. Portable low- or mid-rise lifts come with casters and a dolly handle; once lowered, one person can roll the ~1,000-lb platform across smooth concrete.
Q: What is the typical weight capacity of a mid-rise scissor lift?
A: Most mid-rise automotive scissor lifts are rated at about 6,000 lb. Heavy-duty full-rise versions range from 9,000 to 12,000 lb.
Q: Can I perform wheel alignments on a scissor lift?
A: Yes—if you choose a full-rise “alignment” scissor lift with recessed runways and turn-plate pockets. Portable mid-rise units are usually too short for alignment heads.
Q: Will a scissor lift work with very low-profile sports cars?
A: Pick a lift with a collapsed height under 4 in and long approach ramps. Use low rubber blocks to protect side skirts.
Q: Can I install a scissor lift outdoors?
A: A lift can sit outdoors on level concrete, but covering the power unit and storing the lift inside when possible will greatly extend its service life.
Q: How long does it take to raise or lower a vehicle?
A: Most car scissor lifts reach full height in 30–60 seconds and descend in roughly the same time; cold hydraulic oil may add a few seconds.
Conclusion & Next Steps
Key Takeaways 📌
- Balanced wheels = smooth rides – Even a small imbalance causes vibration. Adding the precise counter-weights with a balancer eliminates shakes and protects steering, bearings, and body panels.
- Longer tire life & better safety – Proper balance promotes even tread wear and keeps full tread contact at speed, reducing blow-out risk and saving you from premature replacements.
-
Choose the right balancer for your needs –
• DIY garages: an affordable entry-level machine (e.g., Katool →models) delivers pro-level accuracy.
• Commercial shops: faster, heavy-duty units (Triumph →, Hunter, etc.) boost throughput and reliability.
Always match machine capacity, wheel-size range, and workflow features to your use-case. - Follow the balancing basics – Strip old weights, enter exact wheel data, attach new weights where indicated, then re-spin to confirm “0.00” imbalance. With practice, each wheel takes just minutes.
- Troubleshoot lingering shakes – If vibration persists, re-check balance, inspect for bent wheels, tire defects, alignment issues, or worn suspension parts. A properly finished wheel should have ≤ 0.25 oz residual imbalance—effectively unnoticeable.
Master these points and you’ll feel the difference every drive: quieter cabin, smoother steering, and tires that wear evenly mile after mile.
Ready to Roll Smoothly?
Browse PitStop Pro’s Wheel Balancer collection → for specs, customer reviews, and bundle deals with tire changers. Whether you need a budget-friendly DIY unit or a truck-rated shop machine, we’ve got you covered.
Questions or one-on-one advice?
Call our expert team at 470-208-2754 or reach out via our contact form—lifetime equipment support comes standard.
Join the Conversation 🗣️
Have a wheel-balancing success story—or a vibration mystery you finally cracked? Drop your tips and questions in the comments below. Your insight might save another driver (and their tires) from a bumpy ride.
Smooth roads ahead—happy balancing! 🥳🚗💨
Keep Reading
Ready to buy?
Find the right alignment machine at Pitstop Pro
We carry wheel alignment machines from top brands. Talk to a Lift Specialist or browse the full collection to find the right system for your shop.
Shop alignment machinesTalk to a Lift SpecialistLifetime customer support and a free fitment consult before you order. No sales tax outside GA, IL, OH.
Leave a comment