

Mistake #2: Not Engaging the Safety Locks
Raising a vehicle and working under it without setting the mechanical locks is gambling with gravity. The locks are there to hold the load mechanically if a hose leaks, a valve sticks, or a seal fails—hydraulics alone are not a safety device. Make it muscle memory: lift to height, lower onto the locks, then work.
Why It’s Risky
-
Hydraulic drift or failure can drop the vehicle unexpectedly.
-
Bypassed locks (wedged open or disabled) remove the last layer of protection.
-
Uneven or partial engagement can let one side slip before you notice.
-
Rushing turns a $0.50 O-ring into your only safety plan—don’t do it.
How Safety Locks Work
On most 2-posts, you’ll hear the ladder locks click as the arms rise; once at working height, lower slightly so the weight rests on solid steel, not fluid pressure. Four-posts → auto-index onto lock ladders as they rise—again, lower gently to seat them before getting underneath. If you can’t see or hear the locks set, assume they aren’t and stop.
Do This Instead
-
Lift, listen, lower: raise to height, listen for clicks, lower 1–2″ to seat on the locks.
-
Visually confirm pawls are engaged; give the vehicle a light shake test—no movement = good.
-
Keep locks clean/lubed; fix sticky pawls or broken springs before use.
-
Never bypass or tie back a lock release—ever.
-
For designs without automatic locks, use jack stands as a mechanical backup before you go under.
Not sure if your lift’s safety locks are working properly or need advice on choosing the right equipment? Contact Pitstop Pro — our team is here to help you stay safe and find the perfect solution.

Not sure what fits your garage? Take the fitment quiz for a tailored recommendation.
Take the Fitment Quiz →Mistake #3: Improper Anchoring and Setup of the Lift
A lift is only as safe as the slab and hardware it’s bolted to. Underspec concrete, wrong anchors, or out-of-plumb posts can turn a routine raise into a topple risk. Treat anchoring and setup as life-safety steps, not “good enough” chores.
Why It’s Dangerous
Improper anchors can loosen or pull out as the posts flex under load, causing a tip or sudden drop. Thin, weak, or uncured concrete won’t hold torque—what feels tight today can fail tomorrow. Misaligned columns bind locks and shift loads to one side, quietly overstressing steel and anchors.
-
Weak slabs (too thin/low PSI) let wedge anchors “cone” the concrete and rip out.
-
Installing over cracks, seams, or expansion joints invites edge breakout.
-
Out-of-level bases make cables/chains fight each other and compromise locking.
Common Anchoring & Setup Errors
Skipping the spec: using whatever anchors are on hand instead of the manufacturer-specified size/type. Rushing torque: not cleaning holes, under-drilling depth, or skipping final torque checks after first use cycles. “Close enough” alignment: leaving posts a degree off plumb or the cross-distance outside tolerance.
-
Using hardware-store anchors vs. the rated wedge/adhesive anchors in the manual.
-
Bolting within a few inches of a slab edge/joint instead of keeping safe setback.
-
Installing on asphalt/wood or on concrete less than ~4" and ~3,000 PSI for light lifts.
Do It Right (Quick Checklist)
Verify the foundation first: confirm thickness, PSI, cure time (≈28 days), and avoid cracks/joints under baseplates. Set posts plumb and square, shim as needed, then drill full-depth with the correct bit and blow out dust before setting anchors. Torque to spec, re-torque after a few cycles, and log it.
-
Follow the lift’s concrete and anchor specs exactly; when in doubt, pour a pad.
-
Keep bases clear of slab edges/joints; maintain the manufacturer’s minimum setback.
-
If the slab is questionable or usage is heavy, consider a 4-post (freestanding) or consult a pro installer/engineer.

Mistake #4: Bad Vehicle Positioning on the Lift
Why it’s dangerous
Poor spotting shifts the center of gravity off the posts/runways. Pads can slip off weak points, the car can teeter as you rise, and big weight changes (engine/trans pulls) can tip the balance unexpectedly.
Common 2-post spotting errors
-
Guessing lift points instead of using the OEM/ALI guide.
-
Pads on thin sheet metal or body seams (crunch/slide risk).
-
Vehicle not centered between posts; arms at odd lengths/angles.
-
Skipping the 2–3 inch test lift + shake to verify stability.
-
Using asymmetric arms but parking like it’s symmetric (or vice-versa).
Four-post positioning must-dos
-
Center the vehicle side-to-side; don’t park too far fore/aft.
-
Set the brake and use wheel chocks—especially before jacking on a jack tray.
-
Roll fully against stop plates; confirm ramps are down/secured.
Do it right (quick checklist)
-
Look it up: Use the vehicle’s lift-point diagram (manual/ALI guide).
-
Pad it right: Use adapters/height extenders; align pads square and fully seated.
-
Center & balance: For asym lifts, set the car slightly rearward as designed.
-
Test first: Raise 2–3", stop, check pad contact/lean, give a firm shake; correct if anything moves.
-
Locks on: At working height, lower onto mechanical locks before you go under.
When weight will shift (engines, transmissions, subframes)
-
Add high-reach stands/pole jacks under the end that will get light/heavy to stabilize (do not lower the vehicle’s full weight onto them).
-
Re-check balance after the part is out; re-spot if needed.
Pro tips
-
One spotter, one set of hand signals—no mixed directions.
-
Keep pads/arms clean and dry; replace worn rubber pads.
-
If you’re unsure, don’t lift—reposition until it’s rock-solid.

READY TO BUY?
Browse all vehicle lifts at Pitstop Pro. 2-post, 4-post, scissor, and alignment options from top brands, with Lift Specialists ready to help you choose.
Shop vehicle liftsMistake #5: Skipping Lift Maintenance
Your car lift is a serious piece of machinery, and like any machine, it needs regular care. Neglecting hydraulics, cables, or electrical systems can lead to sudden failures that put both people and vehicles at risk. From burst hoses to frayed cables or faulty switches, small oversights often snowball into big accidents or costly downtime.
Why Maintenance Matters
Ignoring basic upkeep creates hidden dangers. Hydraulic leaks can cause drops or fire hazards, frayed cables can tip vehicles, and bad wiring may lead to shocks or ceiling strikes. A routine schedule prevents these disasters while extending your lift’s life.
Hydraulic System Care
-
Check fluid levels regularly; change hydraulic oil every 1–2 years.
-
Inspect hoses for cracks, rubbing, or leaks—replace at the first sign of wear.
-
Watch for cylinder leaks; even small drips mean loss of pressure and a slipping hazard.
-
Remember: leaking fluid can ignite on hot equipment.
Mechanical Parts to Watch
-
Inspect cables/chains for frays, kinks, corrosion, or slack.
-
Grease pulleys, sheaves, and carriage slides so they move smoothly.
-
Lubricate lift arm pins and joints to prevent binding.
-
Check and re-torque anchor bolts—loose anchors can shift the entire lift.
Electrical Safety Checks
-
Confirm motor wiring and fusing match manufacturer specs.
-
Test limit switches and safety shutoffs regularly—don’t trust them blindly.
-
Keep power units dry; never pressure wash electrical boxes.
-
Investigate motor strain, odd noises, or slow movement immediately.
Smart Maintenance Habits
Following the manufacturer’s checklist is the simplest way to keep your lift safe. Daily lock checks, monthly lubrication, and yearly hydraulic inspections keep problems from slipping under the radar. Log every service and repair so you know when critical parts were last replaced.
-
Tape maintenance schedules near the lift for easy reference.
-
Do a morning walkaround: look for puddles, leaks, or cracks in the slab.
-
Replace safety labels if worn—they contain useful reminders.
-
Call a certified pro for major repairs; never “patch” load-bearing arms yourself.
Bottom Line
A well-maintained lift runs smoothly, stays reliable, and keeps you safe under the vehicle. Skip the upkeep, and you’re gambling with downtime, expensive repairs, and real danger. Treat maintenance like part of the job, not an afterthought, and your lift will last for decades — and if you’re unsure about service intervals or need expert guidance, give us a call at 470-208-2754 or email support@pitstop-pro.com. Our team is here to help.

Mistake #6: Insufficient Overhead Clearance (Ceiling or Door Interference)
One of the most overlooked hazards with lifts is what’s above the vehicle. Low ceilings, garage doors, lights, or even a lift’s overhead bar can cause serious damage if you don’t plan ahead. Cars have been jammed into rafters, crushed against garage doors, or scraped by openers simply because clearance wasn’t checked.
Why Clearance Matters
In home garages with 9–10 ft ceilings, tall vehicles like SUVs and vans can easily run out of headroom. Two-post lifts → with overhead bars will stop the car if the limit switch works, but cheap lifts may not. Four-post lifts often raise cars so high they nearly touch the ceiling, putting doors, beams, and fixtures at risk.
Common Overhead Hazards
-
Garage doors or tracks interfering with raised vehicles
-
Roof racks, antennas, or open hoods striking ceilings or lights
-
Structural beams, pipes, or heaters in commercial shops
-
Overhead exhaust hoses or hoists that can snag vehicles
-
Doors accidentally closing into stored cars on four-post lifts
How to Avoid It
-
Measure ceiling height vs. lift rise and vehicle height before installation.
-
Add cushion—don’t max out a 10 ft ceiling with a tall truck.
-
Choose lifts with overhead safety cut-off bars (like the Triumph → NTO-11A).
-
Consider high-lift garage door hardware to move tracks higher.
-
Always do a slow test raise the first time in a new bay.
Real-World Best Practices
Plan every lift with a “three-dimension check”: floor, sides, and overhead. Keep hoods and trunks closed, and post reminder signs if others use the lift. Develop a simple checklist—vehicle centered, locks engaged, overhead clear—before raising. These quick steps prevent roof dents, door scrapes, and ceiling collisions that could ruin your day (and your car).

Mistake #7: Skipping Daily Inspections and Routine Safety Checks
It’s tempting to roll a car on and hit the button, but skipping pre-use checks is a costly shortcut. A lift can give off warning signs—leaks, frays, or loose locks—that are obvious if you look. Like a pilot’s walk-around, a daily inspection only takes minutes but can prevent accidents and expensive downtime.
Daily Walk-Around Checklist
-
Visual once-over: Look for frayed cables, kinks, cracks, missing adapters, or loose bolts.
-
Hydraulics: Check fluid levels, watch for puddles or drips at posts, hoses, or cylinders.
-
Safety locks: Raise the empty lift until locks click, then lower to confirm they hold.
-
Functional test: Run the lift up and down unloaded; test emergency stop and limit switches.
-
Housekeeping: Keep the lift area clear of tools, cords, or oil spills; use wheel chocks when needed.
Why It Matters
Most lift failures don’t happen suddenly—they give hints first. A cable with broken strands or a safety lock that doesn’t click is a red flag you’ll only catch during a check. Catching small issues early saves you from catastrophic failures, costly repairs, or worse.
Annual Inspections
-
ALI and OSHA recommend yearly inspections by a certified lift inspector.
-
Inspectors check hidden wear: slide blocks, anchors, synchronization, internal stress.
-
Reports and inspection stickers provide proof of compliance and peace of mind.
-
Many shops require annual inspections for liability, but home users benefit too.
How to Build the Habit
Make safety checks part of your workflow. Pros should start every day with a lift check, and hobbyists should do one each session. Keep a laminated checklist posted on the lift and maintain a logbook for maintenance and inspections—it’s a simple way to track service and spot overdue tasks.
Bottom Line
Complacency is the real danger. Even the best lifts loosen, wear, and leak over time. Staying consistent with daily and annual inspections ensures safety, reliability, and peace of mind every time you raise a vehicle.

OSHA, ANSI/ALI, and Manufacturer Guidelines – Staying Compliant
Safe lift operation isn’t just about habits—it also means following OSHA, ALI, and manufacturer standards. OSHA doesn’t have a lift-specific regulation, but under the “General Duty Clause” they can cite operators for failing to eliminate recognized hazards. In practice, that means if you aren’t following industry standards or the manufacturer’s manual, you could be held responsible if an accident occurs.
OSHA and Industry Standards
-
OSHA enforces safe lift use through the General Duty Clause.
-
Recognized hazards are defined by ALI standards and manufacturer instructions.
-
Noncompliance can result in citations, liability, or denied insurance claims.
Key ALI Standards
-
ANSI/ALI ALCTV: Covers construction, testing, and validation of lifts; ALI-certified lifts carry a gold label proving they meet strict safety benchmarks.
-
ANSI/ALI ALOIM: Governs day-to-day operation, inspection, and maintenance; OSHA recognizes it as the accepted guideline.
-
Many local codes and insurers require ALI-certified lifts and annual inspections.
Manufacturer Guidelines
Always read and follow the manual that comes with your lift. Instructions on cable replacement intervals, hydraulic fluid types, and torque values are based on engineering data, not suggestions. Even decals serve a purpose by reminding operators to engage locks, follow lift points, and check safety features before working under a vehicle.
Training and Recordkeeping
-
Only trained operators should use a lift; OSHA and ALI both emphasize training.
-
ALI’s Lifting It Right program is widely used to train technicians and DIYers alike.
-
Shops should document employee training, inspections, and maintenance.
-
Keeping records protects against liability and adds resale value to a well-maintained lift.
Bottom Line
Compliance isn’t just about avoiding fines. OSHA, ALI, and manufacturer standards exist because real-world accidents proved what happens when they’re ignored. By following these guidelines, you ensure safer lifts, fewer breakdowns, and peace of mind every time a vehicle leaves the ground.
Example Products: 2-Post and 4-Post Lifts with Excellent Safety Features
To close out, let’s look at two lifts that bring together the safety principles we’ve covered. Both are Triumph models sold on Pitstop-Pro.com, chosen because they combine strong build quality with practical safety features. Whether you’re running a professional shop or setting up a home garage, these lifts make safe operation easier.
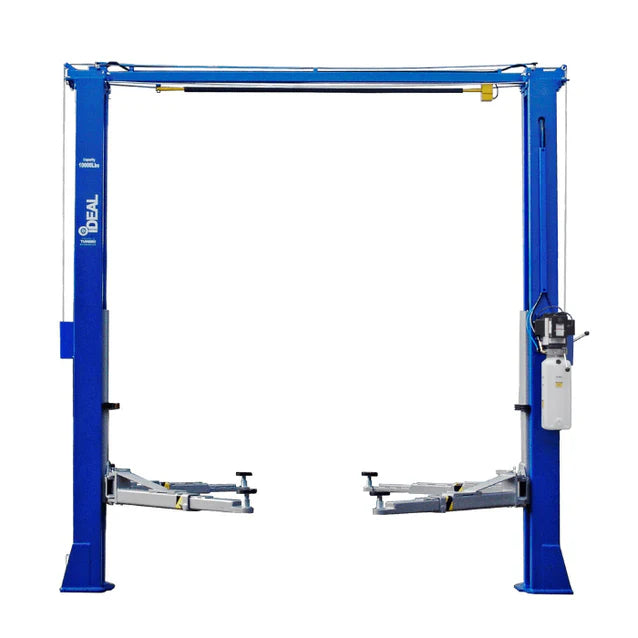
iDEAL TP10KAC-DX 10,000 lb ALI-Certified Two-Post Lift ($4,800.00)
If you want a 2-post that bakes safety into everyday workflow, the iDEAL TP10KAC-DX is a great fit for shops and serious home garages. With 10,000 lb total capacity (2,500 lb per arm), an overhead shutoff bar, automatic arm restraints, and a single-point latch release, it’s engineered to make safe operation simple and repeatable while delivering the durability busy bays demand.
-
Automatic arm restraints lock as soon as the pads contact the vehicle, reducing slippage risk during raise, set-down, and service.
-
Overhead shutoff bar stops travel on roof or rack contact, helping prevent ceiling strikes and costly accidental damage.
-
Heavy-duty carriages with UHMW rub blocks reduce wear, keep column travel smooth, and extend service life under daily use.
-
ALI certification → verifies construction, load holding, and lock reliability so you’re aligned with recognized industry safety standards.
-
Bi-symmetric swing arms let you choose asymmetrical or symmetrical positioning, improving balance and stability across compact cars, SUVs, and light trucks.
Safety note: Concrete must be at least 4-1/4" thick at 3,000 PSI minimum; installing on inadequate slab can cause serious injury or death—confirm thickness and strength before purchase and install.
Tuxedo FP8K-DX-XLT 8,000 lb 4-Post Storage Lift -Extended Length/Height ($4,030.00)
Built for safe, everyday storage and service, the FP8K-DX-XLT combines 8,000 lb capacity with extended length/height and a safety-first design. Drive on, center, and lower onto 12 mechanical lock positions—backed by a single-point lock release, slack-cable safety system, and diamond-plate, non-skid runways for confident loading. It runs on a standard 115 V outlet and includes a jack tray, two drip trays, and a caster kit so you’re ready on day one.
-
Mechanical Locking Ladders (12 positions) – Runways rest on solid steel, not fluid pressure, eliminating hydraulic drift risk at working height.
-
Single-Point Manual Lock Release – One control releases all corners evenly after you verify each lock is fully disengaged before lowering.
-
Slack-Cable Safety System – If a cable loses tension or stretches, descent is halted to prevent a sudden drop or skewed runway alignment.
-
Positive Wheel Containment – Integrated stop plates help prevent overshoot; always add wheel chocks for storage and during runway jacking.
-
Robust, Powder-Coated Structure – Corrosion-resistant finish protects locking components and hardware for consistent, predictable engagement.

This lift makes it easy to safely store one car above another or perform basic maintenance without worry. The accessories, locks, and user-friendly design help ensure every lift is stable and secure, even for first-time users.
Internal Resources
If you’re considering a purchase, explore our 2-Post Lift Collection for more options with detailed safety specs, or check out our 4-Post Lift Guide to help decide which style fits your garage best. For setup, our Installation & Safety Guides include checklists and tips so your lift is anchored and operated correctly from day one.
Conclusion: Lift Smart, Lift Safe
Vehicle lifts → make any garage more capable—whether that’s easier repairs or extra parking space. But safe use is what keeps those benefits from turning into hazards. Most accidents come from small, avoidable mistakes, and the fixes are straightforward once you know them.
Key Safety Habits
-
Respect weight limits and place vehicles correctly.
-
Use safety locks every time.
-
Follow manufacturer instructions during setup and operation.
-
Keep up with routine maintenance.
-
Check for overhead clearance before lifting.
-
Do quick daily inspections and schedule annual certified checks.
Accidents don’t happen because people plan for them—they happen when planning is skipped. Every safety feature and guideline exists because someone else already made the mistake. By taking a few extra minutes to check your setup and stay alert, you can lift with confidence.
Stay cautious, enjoy your lift, and make safety a habit. Lift smart, lift safe, and your equipment will reward you with years of reliable use. And if you’d like expert help choosing a lift, adding accessories, or making sure your setup is safe, give us a call at 470-208-2754 or email support@pitstop-pro.com — the Pitstop Pro team is here to keep your garage running safely and smoothly.
Leave a comment